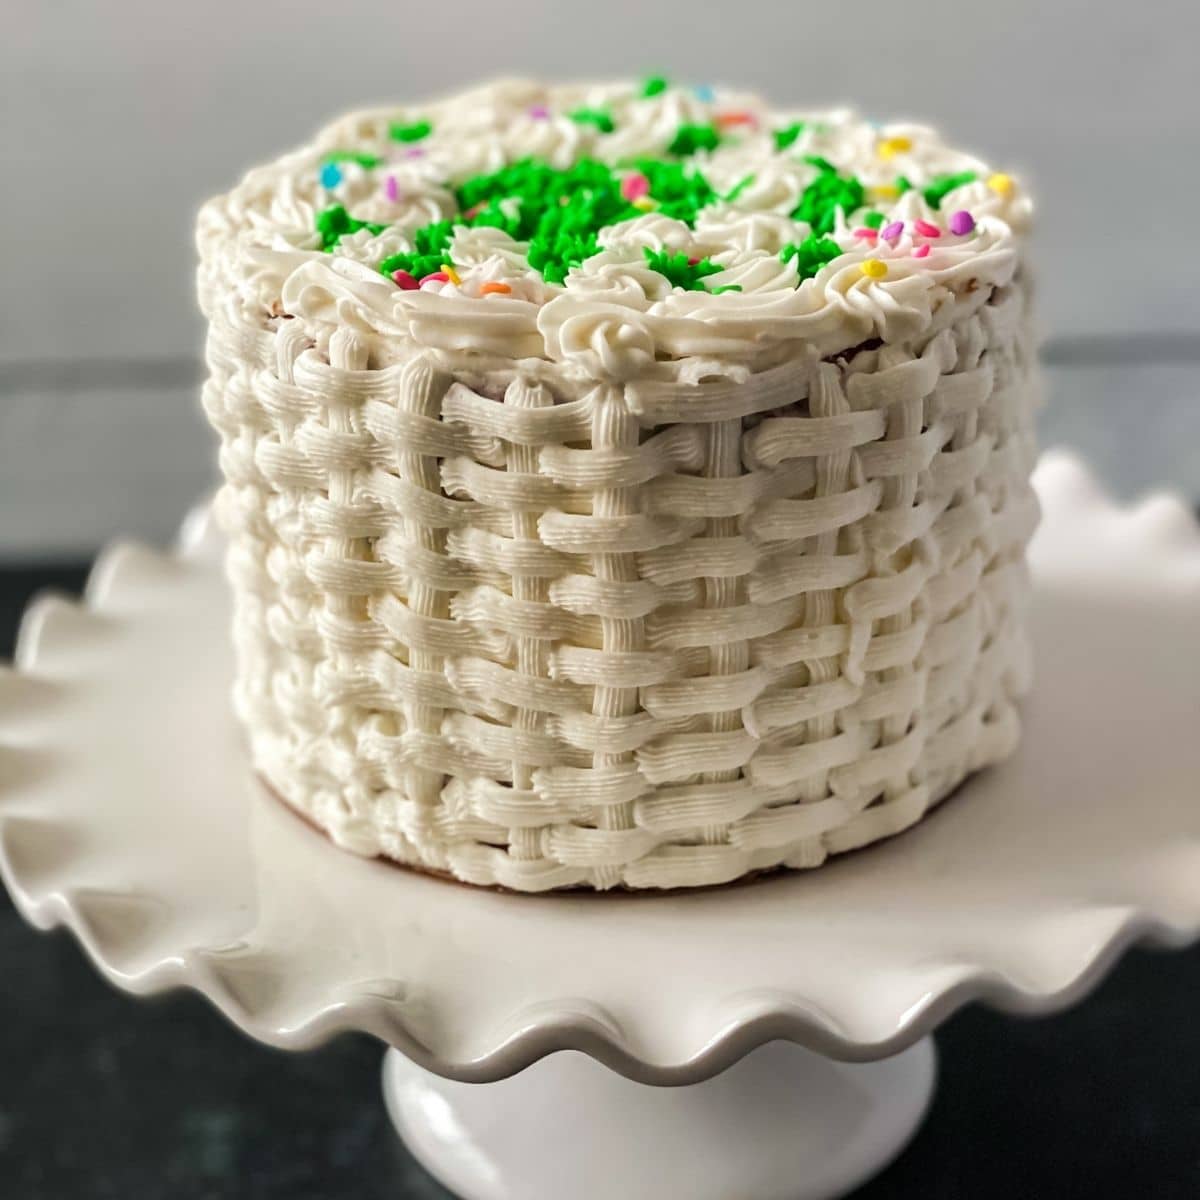
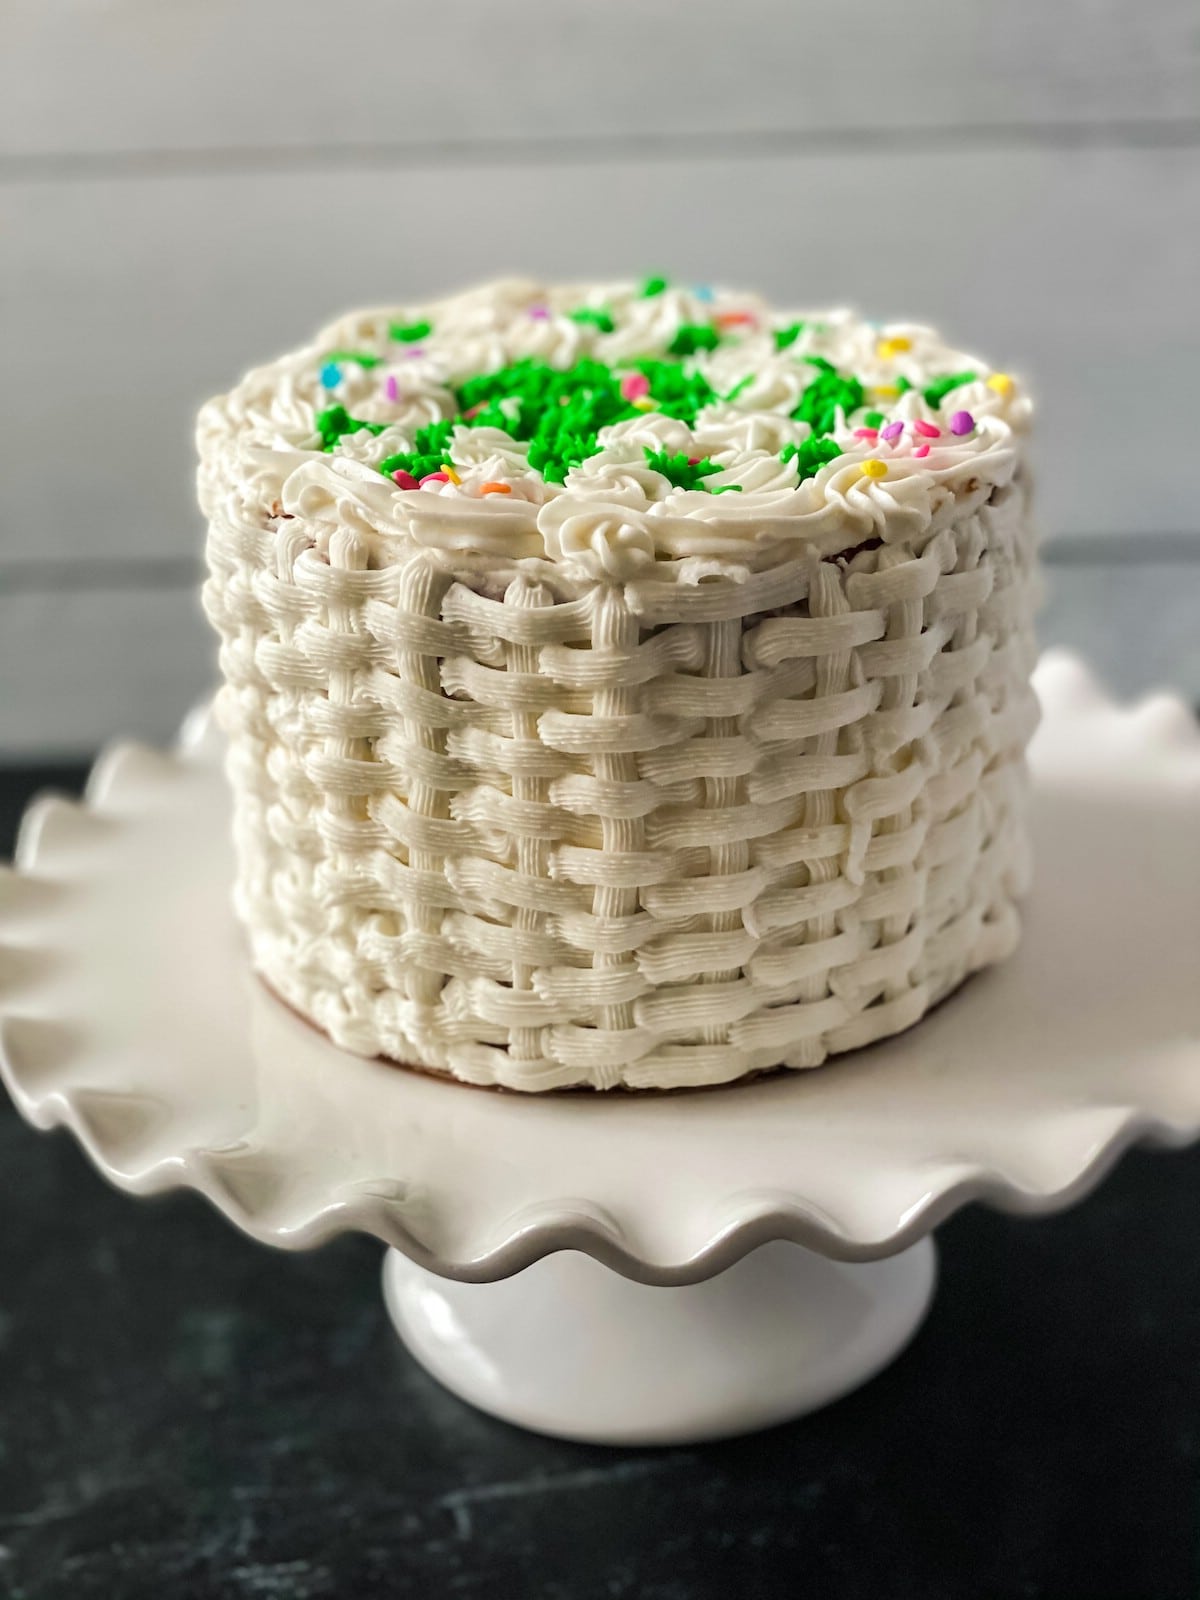
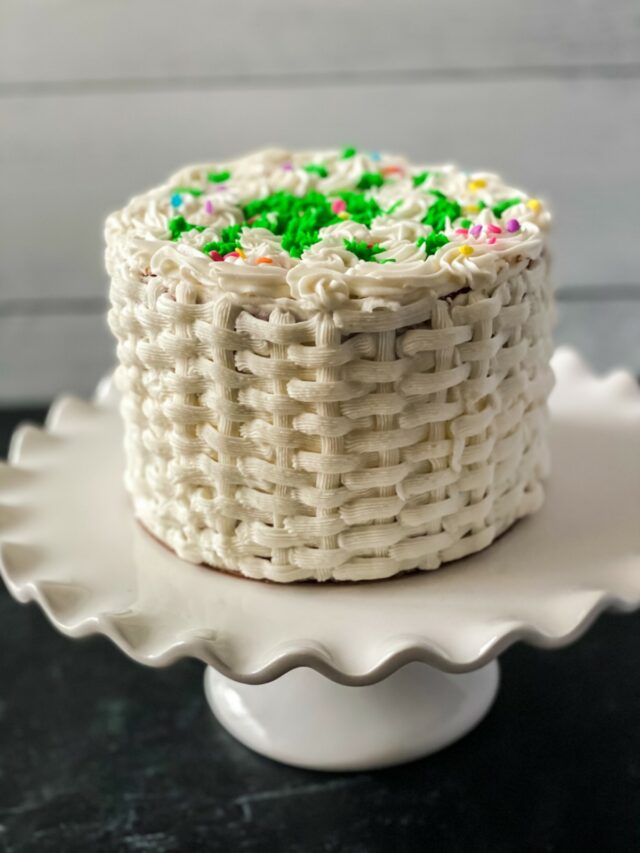
Want to make a fancy cake without a lot of effort? This basket wave icing tutorial makes the ultimate Easter cake! You can follow this method with any holiday but it is especially fun when made for Eater as it is so reminiscent of a real basket that would hold eggs!
Easy Easter Cake Decorating Tutorial
Cake decorating can seem like a really daunting task, but really, it's just a lot of little actions that combine to create something beautiful. This is one of my favorite ways to make a cake look beautiful without having a ton of details. The basket weave pattern takes a bit of time, but it is the same process over and over, which makes it easier to make for anyone new to cake decorating.
Another easy option is this Easter bunny cupcake idea using ready-made cupcakes with simple icing to look like grass. Such a cute idea that is easy for portions already made to serve.
What Type of Icing Should I Use?
This kind of decorating requires using buttercream. It needs to be a nice thick icing that will hold the shape. A prepared icing from the grocery store baking aisle will not give you the result wanted or expected with this design method.
The recipe for frosting found in this copycat Magnolia bakery cupcake recipe is great for this recipe as well. Just leave out the food dye if you want to keep it a nice white color. You can also buy buttercream mix online or at a craft store that features cake decorating to use in place of this.
Can I Do This With Any Cake?
Yes! Whether you make a cake from scratch or you use a boxed mix, this recipe can work. I've even purchased cakes from the bakery that aren't iced and added icing to them myself. There are tons of options.
For Easter, we like to use this coconut cake recipe as the base for this icing tutorial. It's super moist and flavorful. It could also be made with a lemon cake, carrot cake, vanilla, or strawberry for a fresh Easter springtime flavor.
What Should I Add to Make it Look Like an Easter Cake?
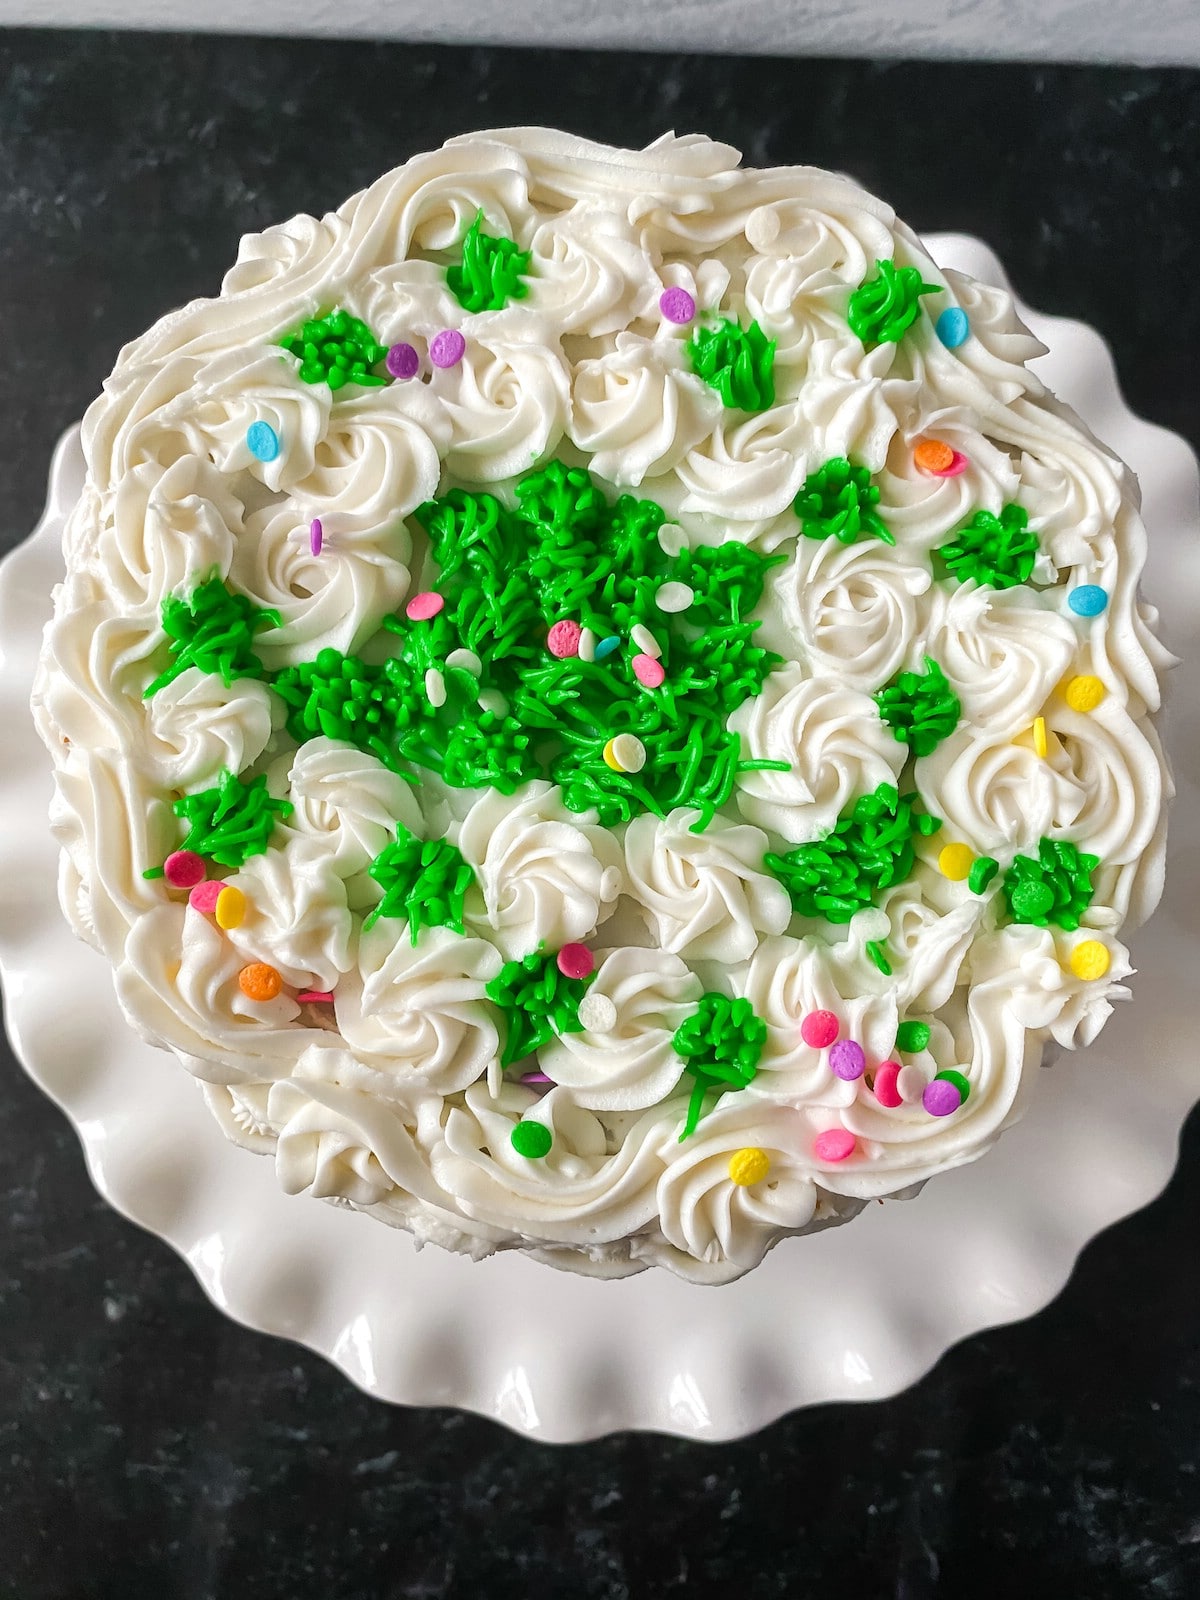
Just the basket weave isn't enough to truly make this look like an Easter cake. I love the idea of decorating the top of the cake as if it is holding Easter eggs. There are a few ways to do this and some of my favorites are below.
- Use green icing and a grass icing tip to pipe icing along the top of the cake. Then put candy eggs in groups around the top.
- Add a few of these copycat Easter Peeps homemade marshmallows on the top of the cake, or around the base.
- Dye some of the icing pastel pink, yellow, green, or blue, and make the basket weave a springtime multi-colored look.
- Add Easter sprinkles along the top or around the bottom edge of the cake. I love these bunny butt sprinkles! So cute!
Does This Cake Need to Be Refrigerated?
The cake does not have to be refrigerated. It can be stored, covered, at room temperature for up to 3 days. However, if refrigerated, it can last for up to 7 days. I find that in humid climates or summer months, it is best to refrigerate the cake until about 30-minutes before ready to serve.
How Do I Store an Iced Cake?
Ultimately, the best way to store this cake and keep all of the details is to use a cake stand with a lid or a cake carrier. Both keep the cake from getting stale or getting too dry. They are also easier to transport when using these methods.
When making this cake, I recommend using a cardboard cake board under the cake as you ice it. This will make it easy and safe to move from the workspace onto the cake stand or into the cake carrier without damaging the design.
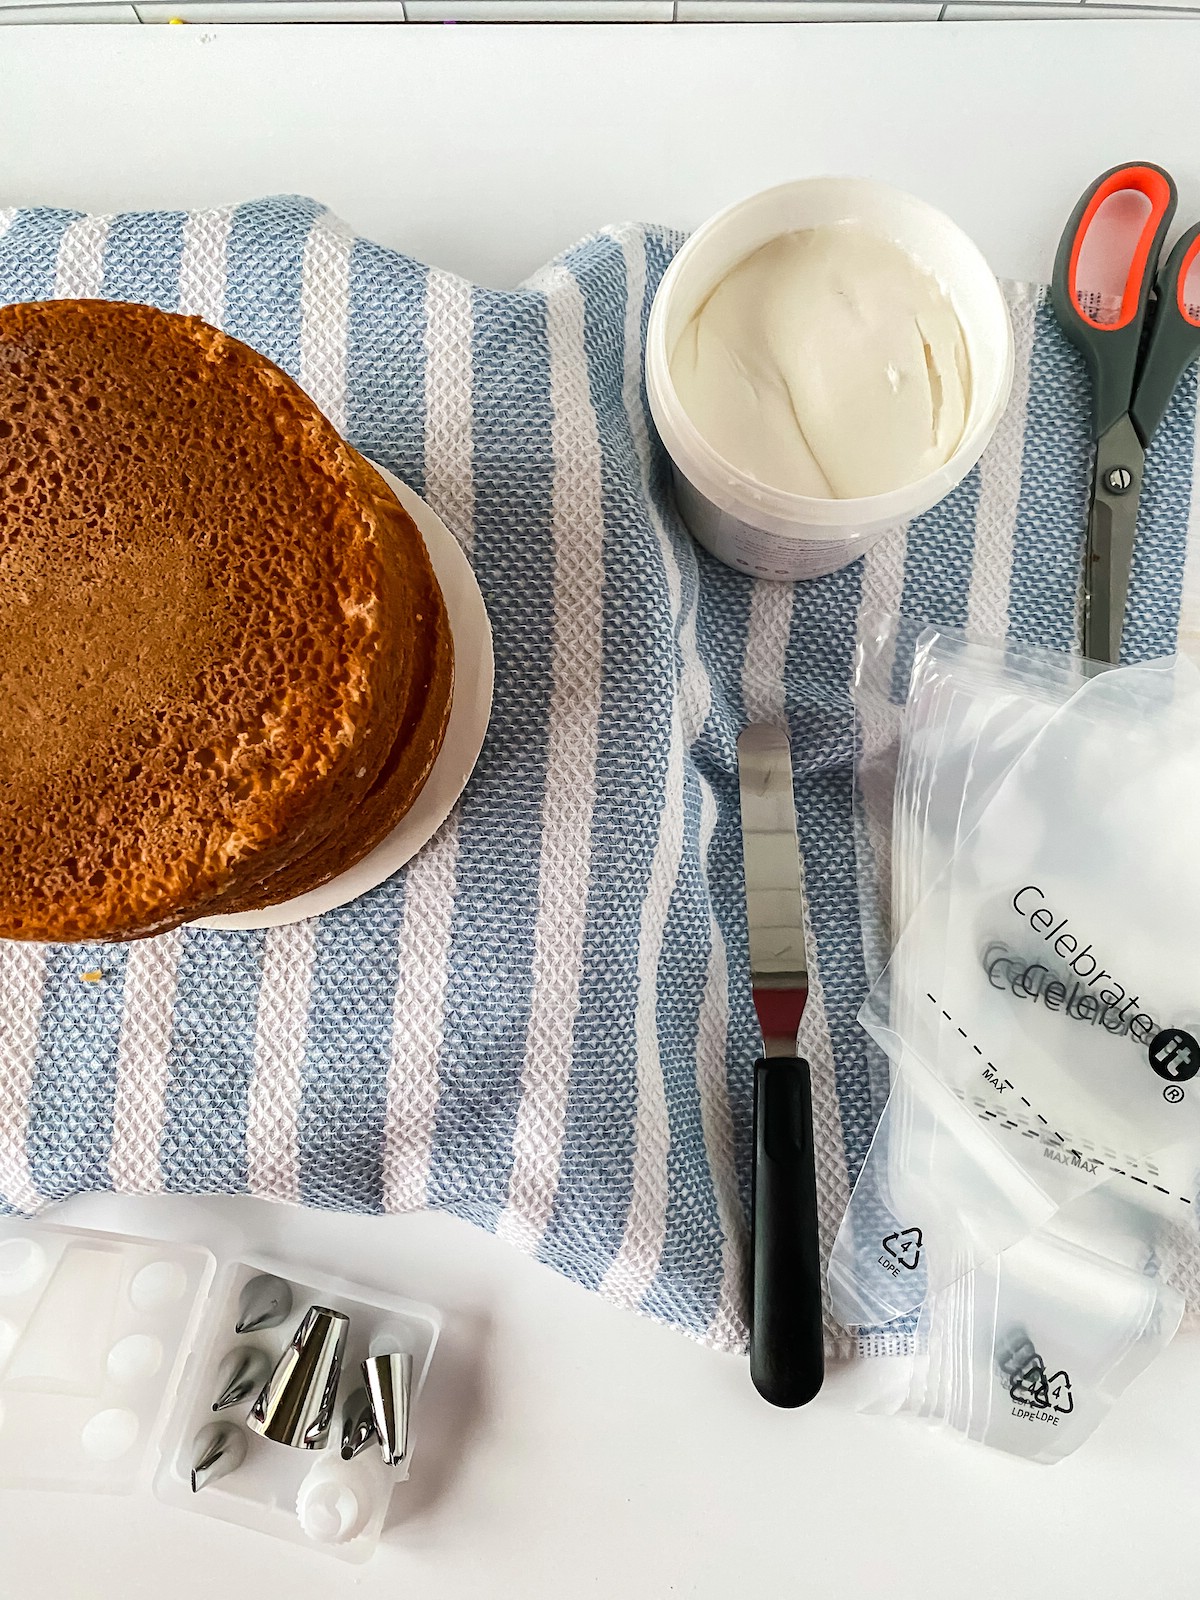
What's Needed
- Rotating cake turntable
- Cardboard cake board
- Offset spatula
- Piping bags
- Basket weave piping tip
- Piping bag coupler
- Buttercream icing
- Cake - for this recipe 3 (6") cake rounds were used
TIP: Freezing the cake before icing will help keep the frosting from melting and make it easier to coat without having too many crumbs.
How to Set Up the Cake for Icing
Set up your workstation using a lazy susan or turntable with a cake board on top.
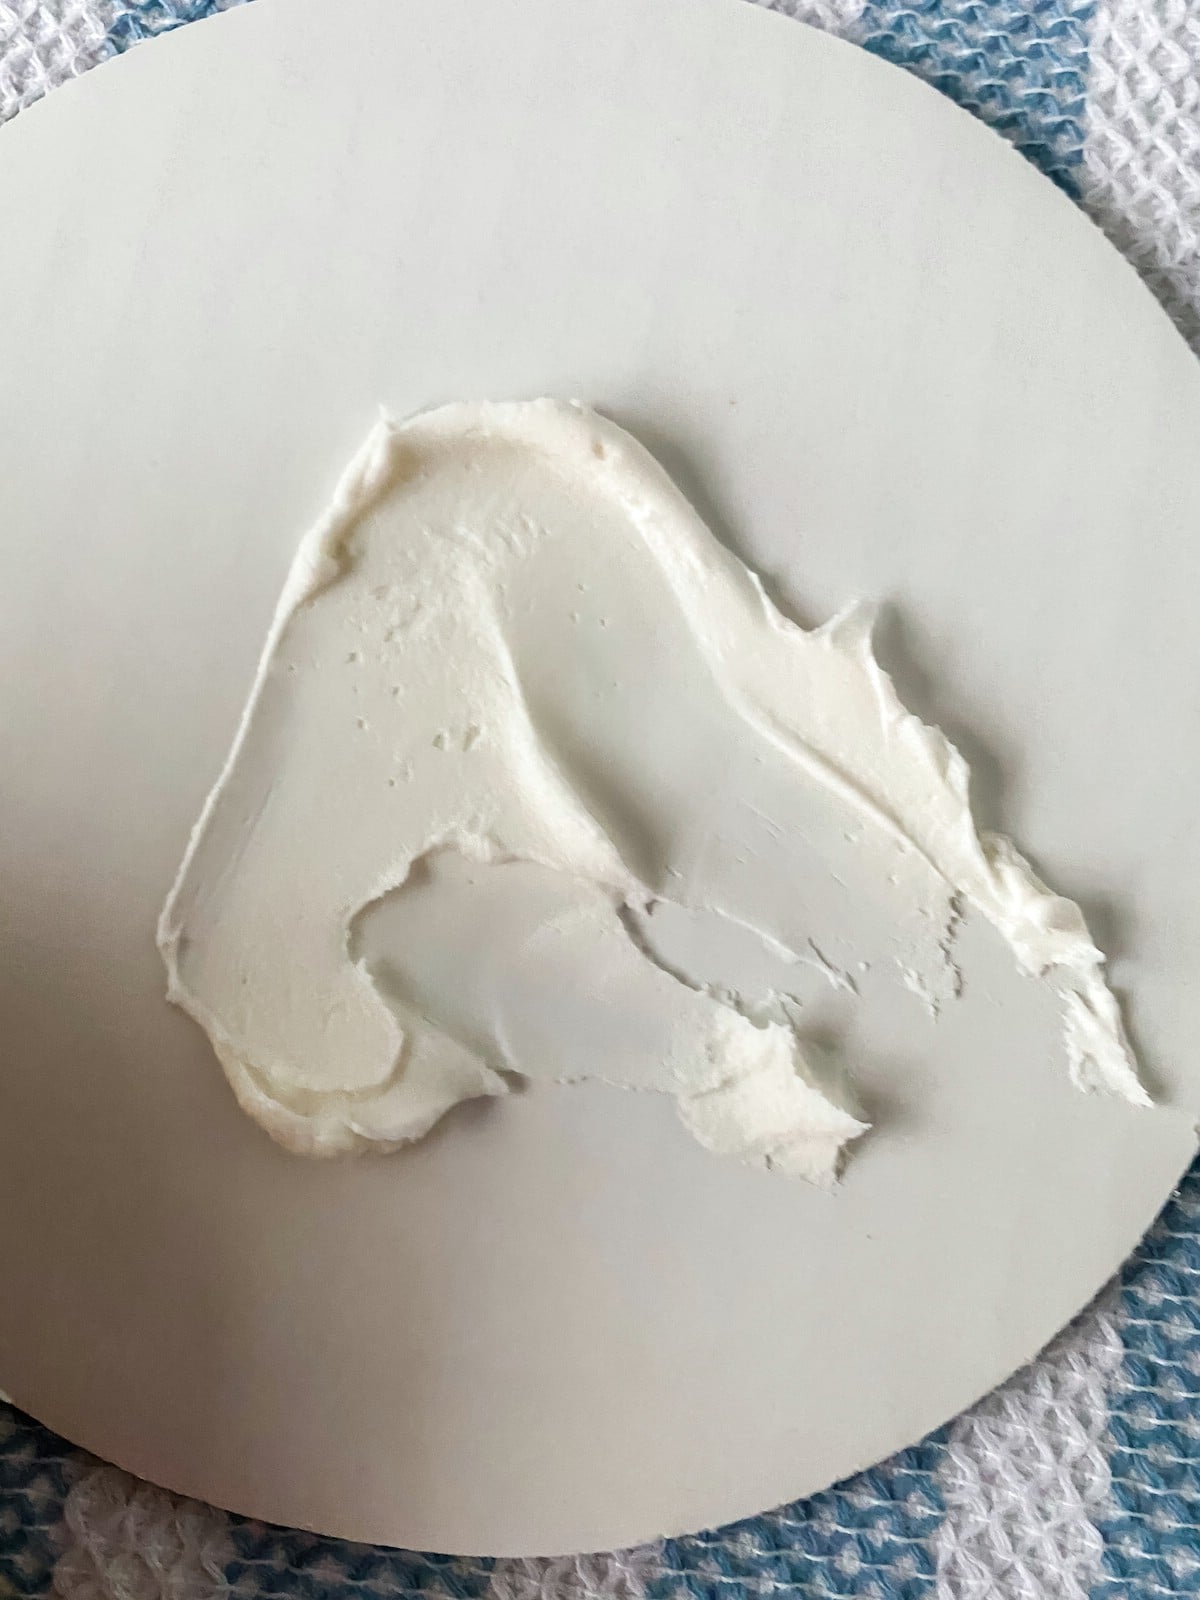
Place a dollop of buttercream onto the center of the cake board, this will hold the cake in place.
Place a cake round onto this and then top with a layer of icing. Repeat until all 3 layers are in place with icing between each.
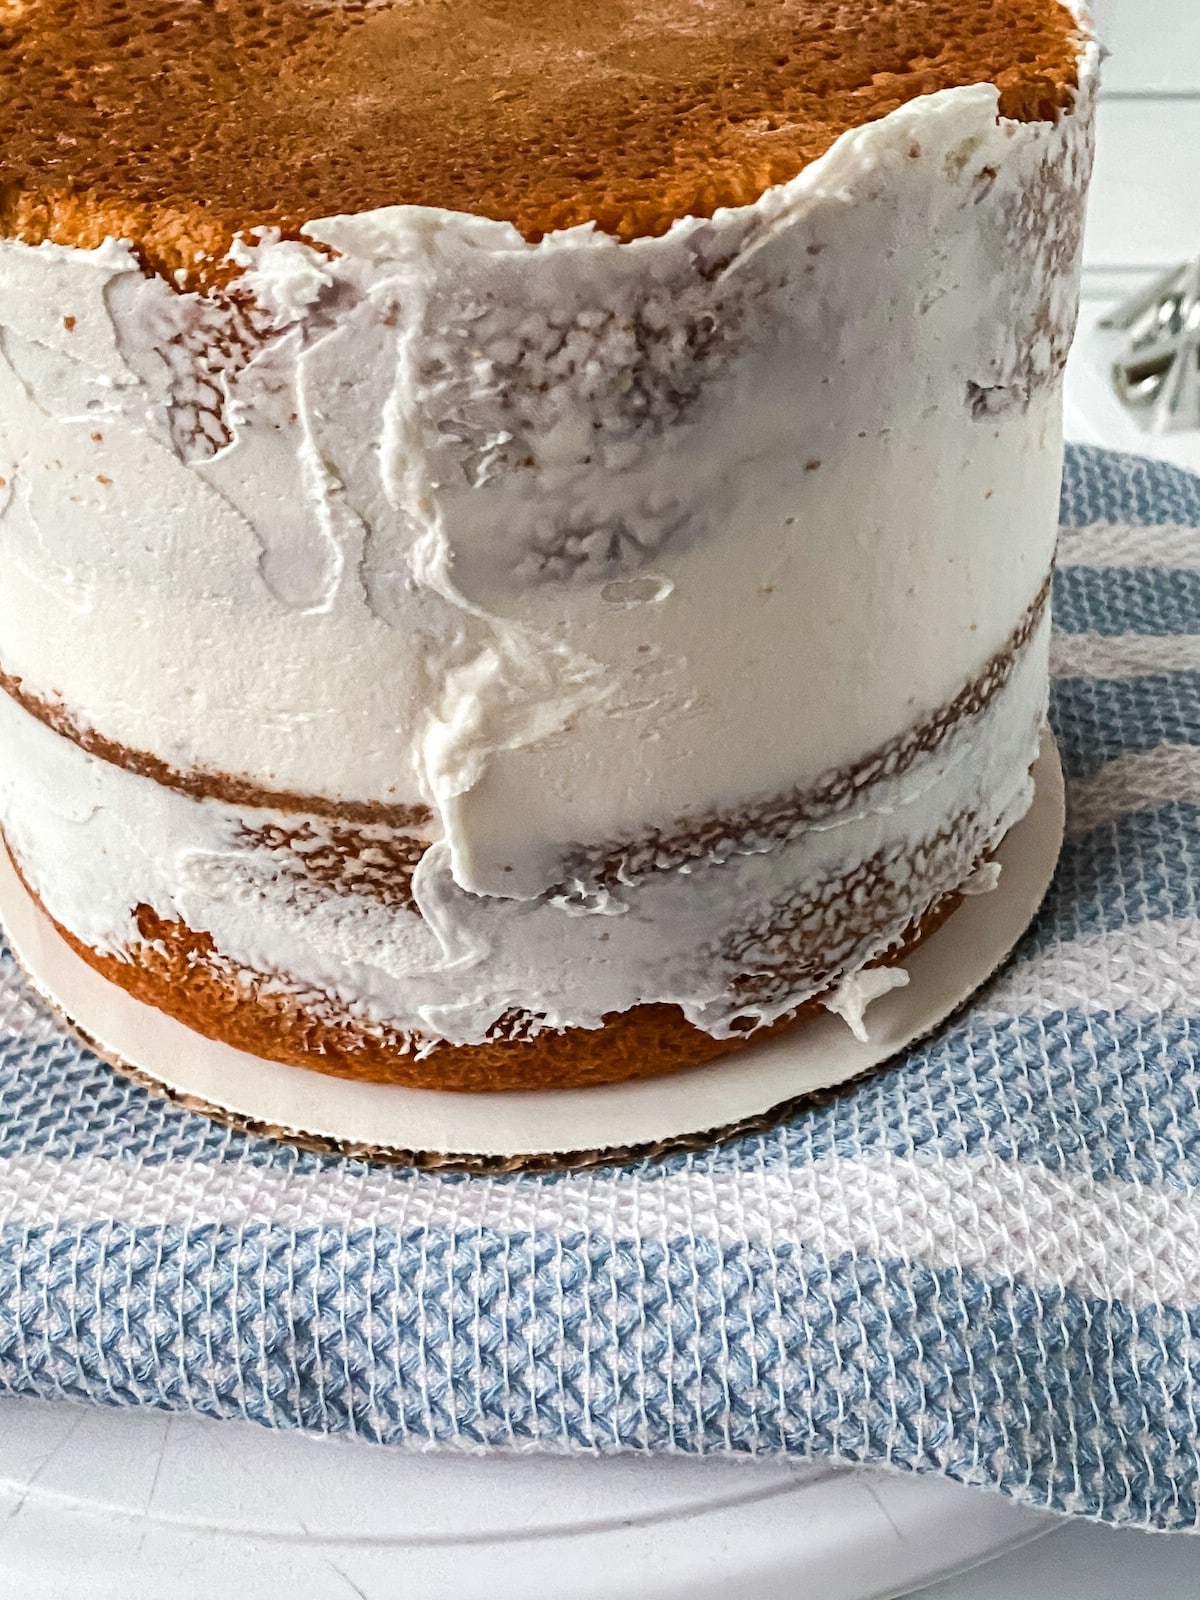
Add a thin layer of buttercream icing around the entire cake as a crumb coat.
Refrigerate the cake for 10 to 15 minutes while you prepare icing in the piping bags.
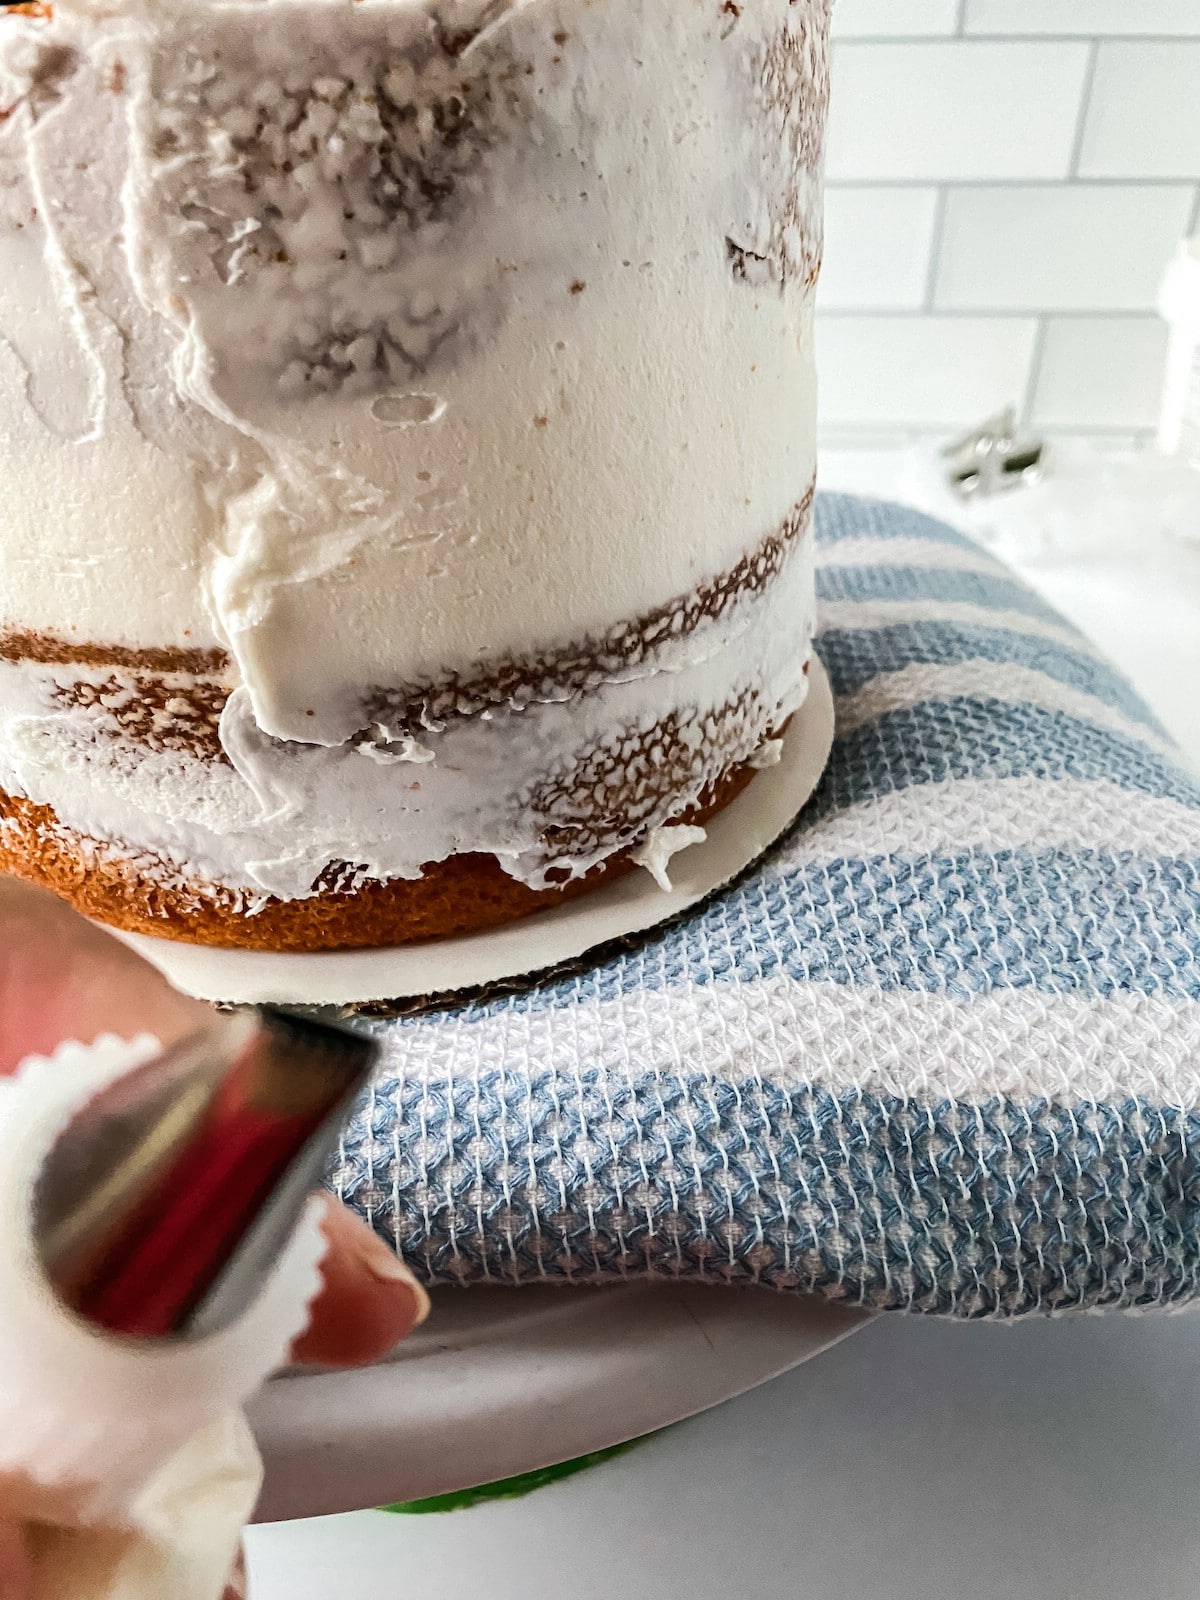
Place the coupler into the piping bag and fit with a 47 basket weave tip.
Fill the bag half full with prepared buttercream icing, then remove excess air and twist the top to secure.
Place the cake back onto the turntable.
To decorate, keep a visual in mind of the top of the cake looking like a clock, this will help you to follow the directions below better.
How to Begin the Basket Weave Process
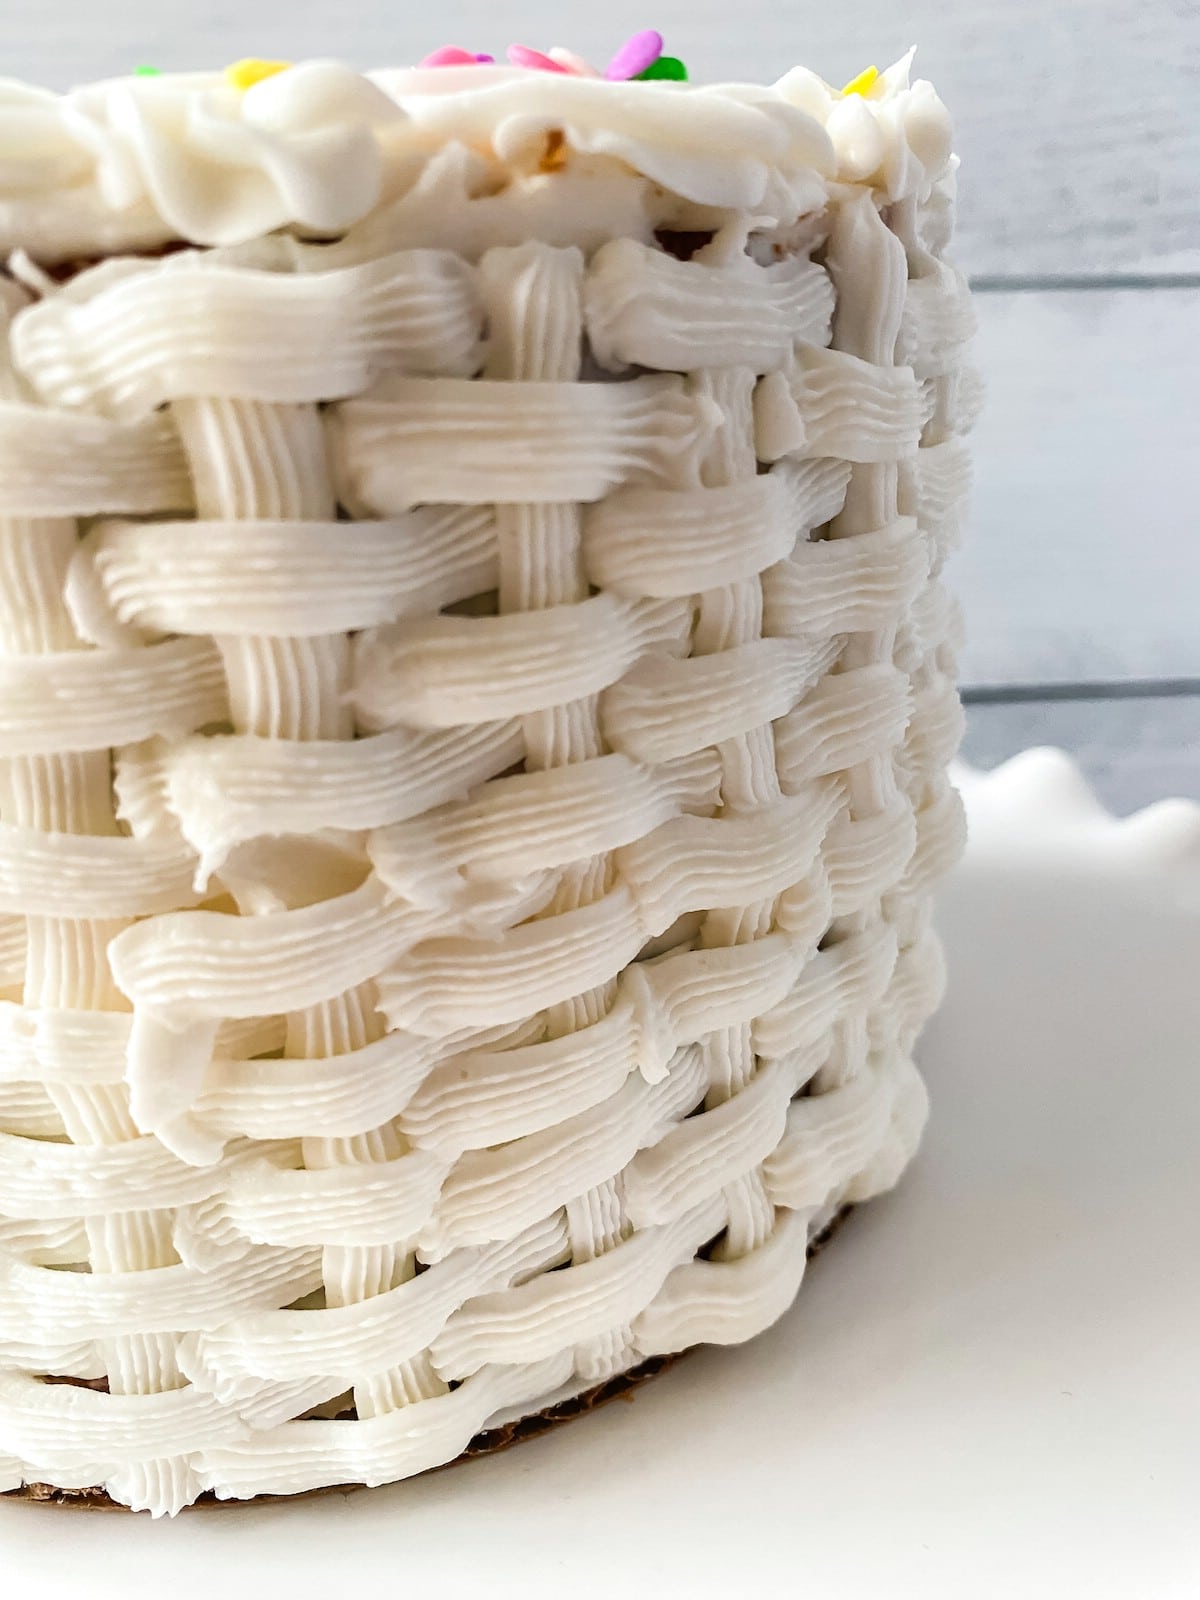
Hold the piping bag at a 45° angle starting at the 6 o'clock point.
Carefully, and lightly, touch the piping tip to the side of the cake with the serrated side up, and squeeze out a vertical strip of icing from the top to the bottom of the cake. Maintain even pressure for best results.
At the bottom, stop squeezing and then pull away. Throughout this process, you will use the clock format and "squeeze, stop, pull away".
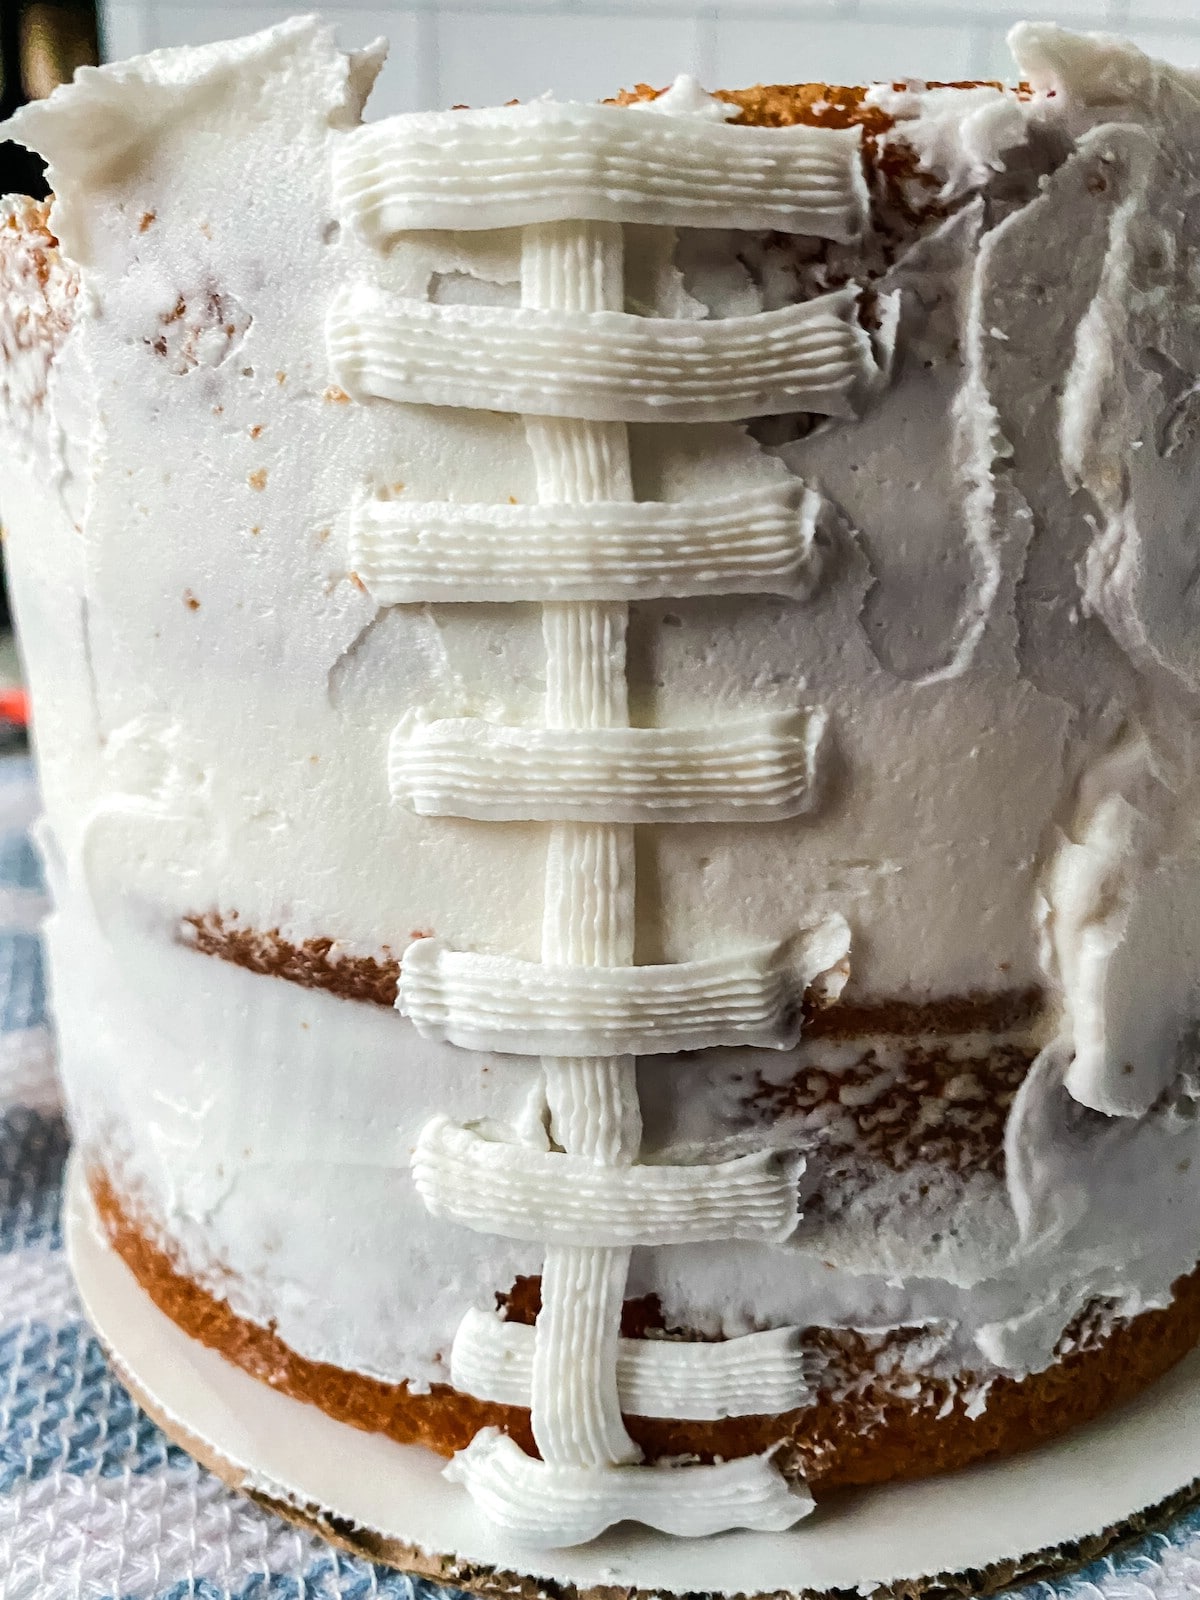
Move to the 3 o'clock point on the cake, and with the same 45° angel, squeeze out short horizontal stripes of icing over the vertical line starting at the top and working your way to the bottom. Maintain an even distance between these horizontal stripes.
Pipe another vertical line starting at the edge of the horizontal stripes and covering them from top to bottom.
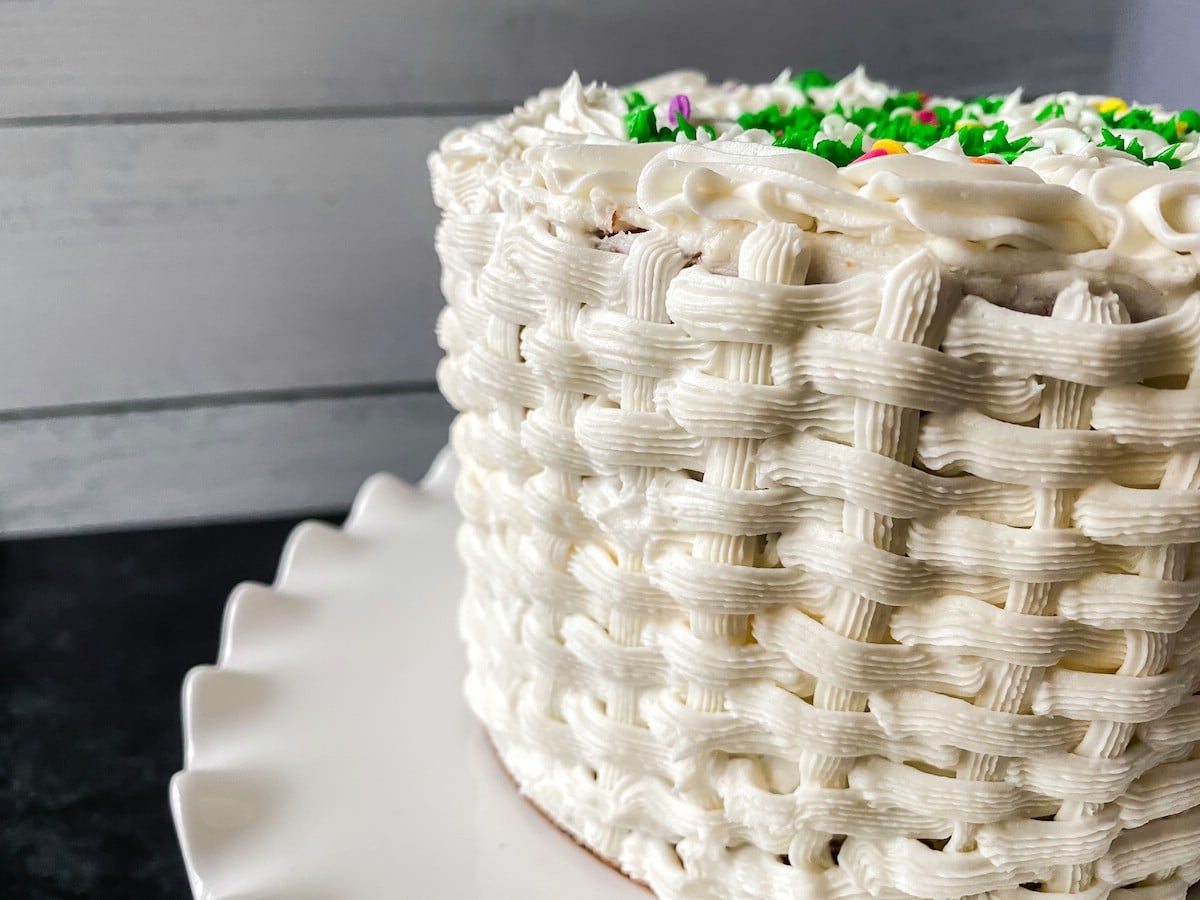
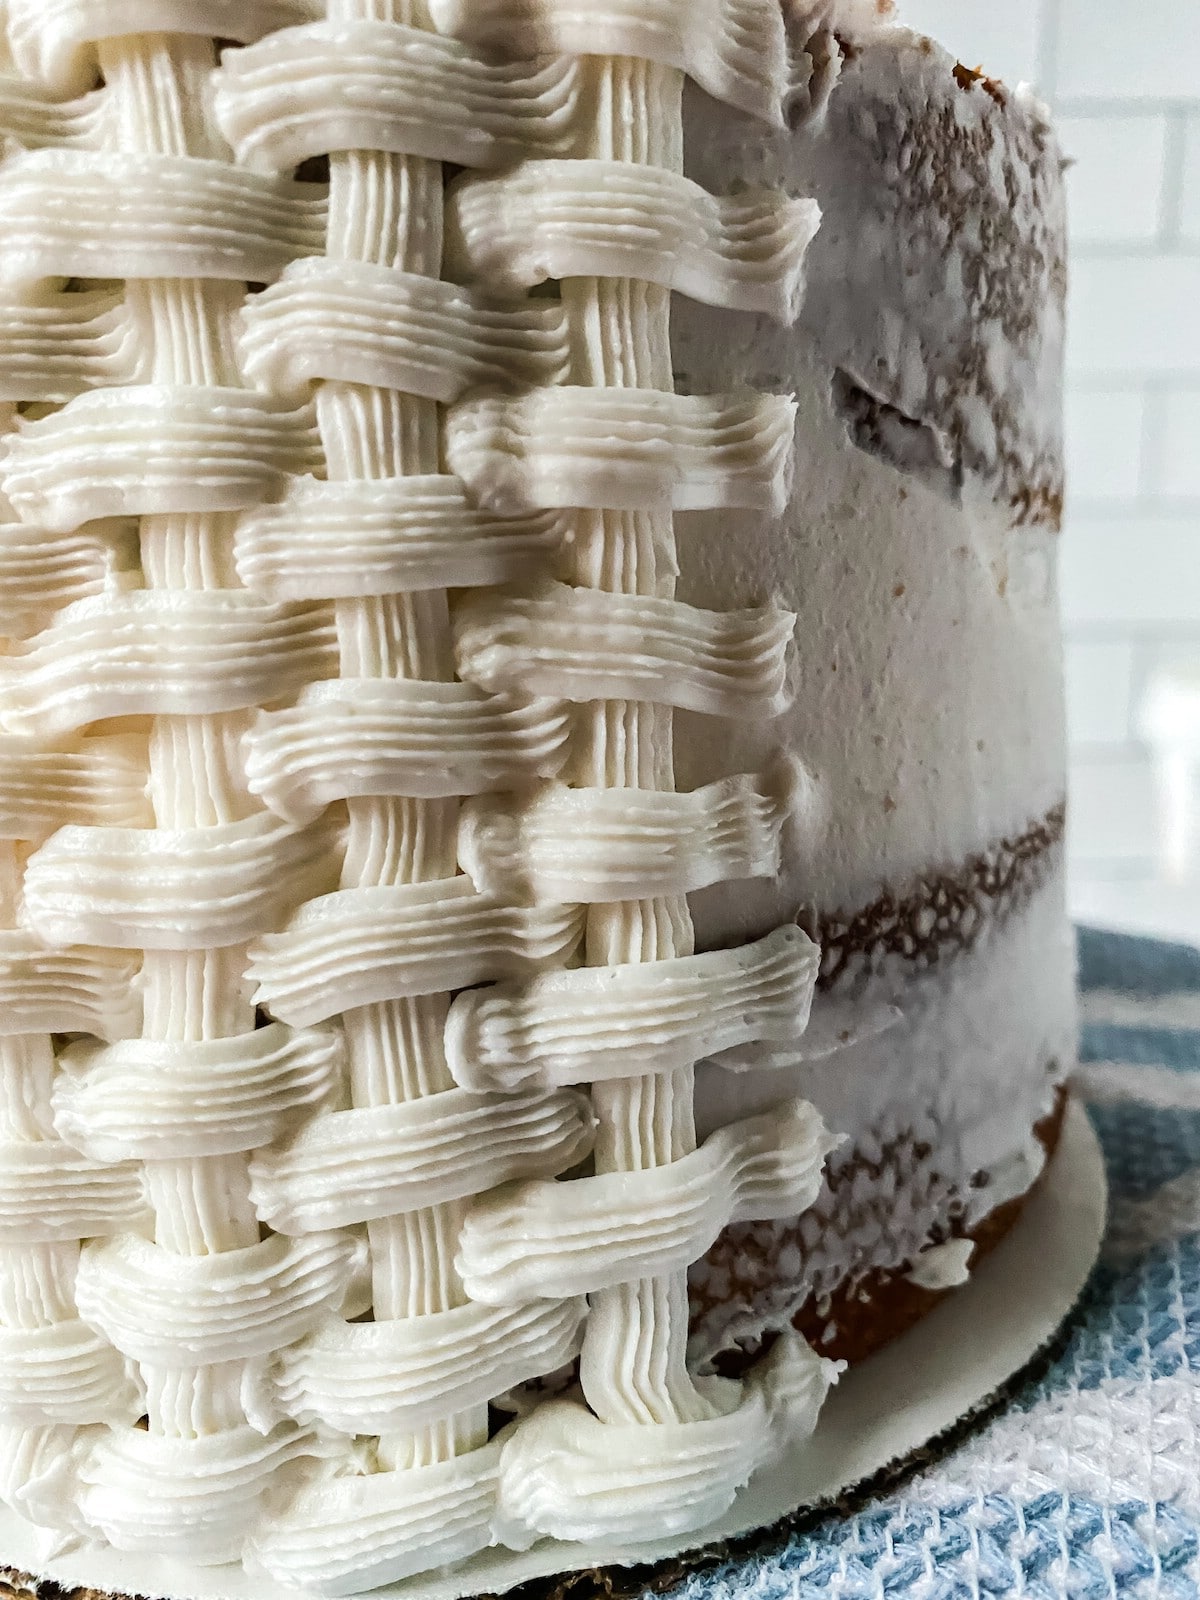
Continue this process working your way around the cake with a solid vertical stripe, then horizontal stripes, then vertical, and so on until all of the cake is covered with the basket weave pattern.
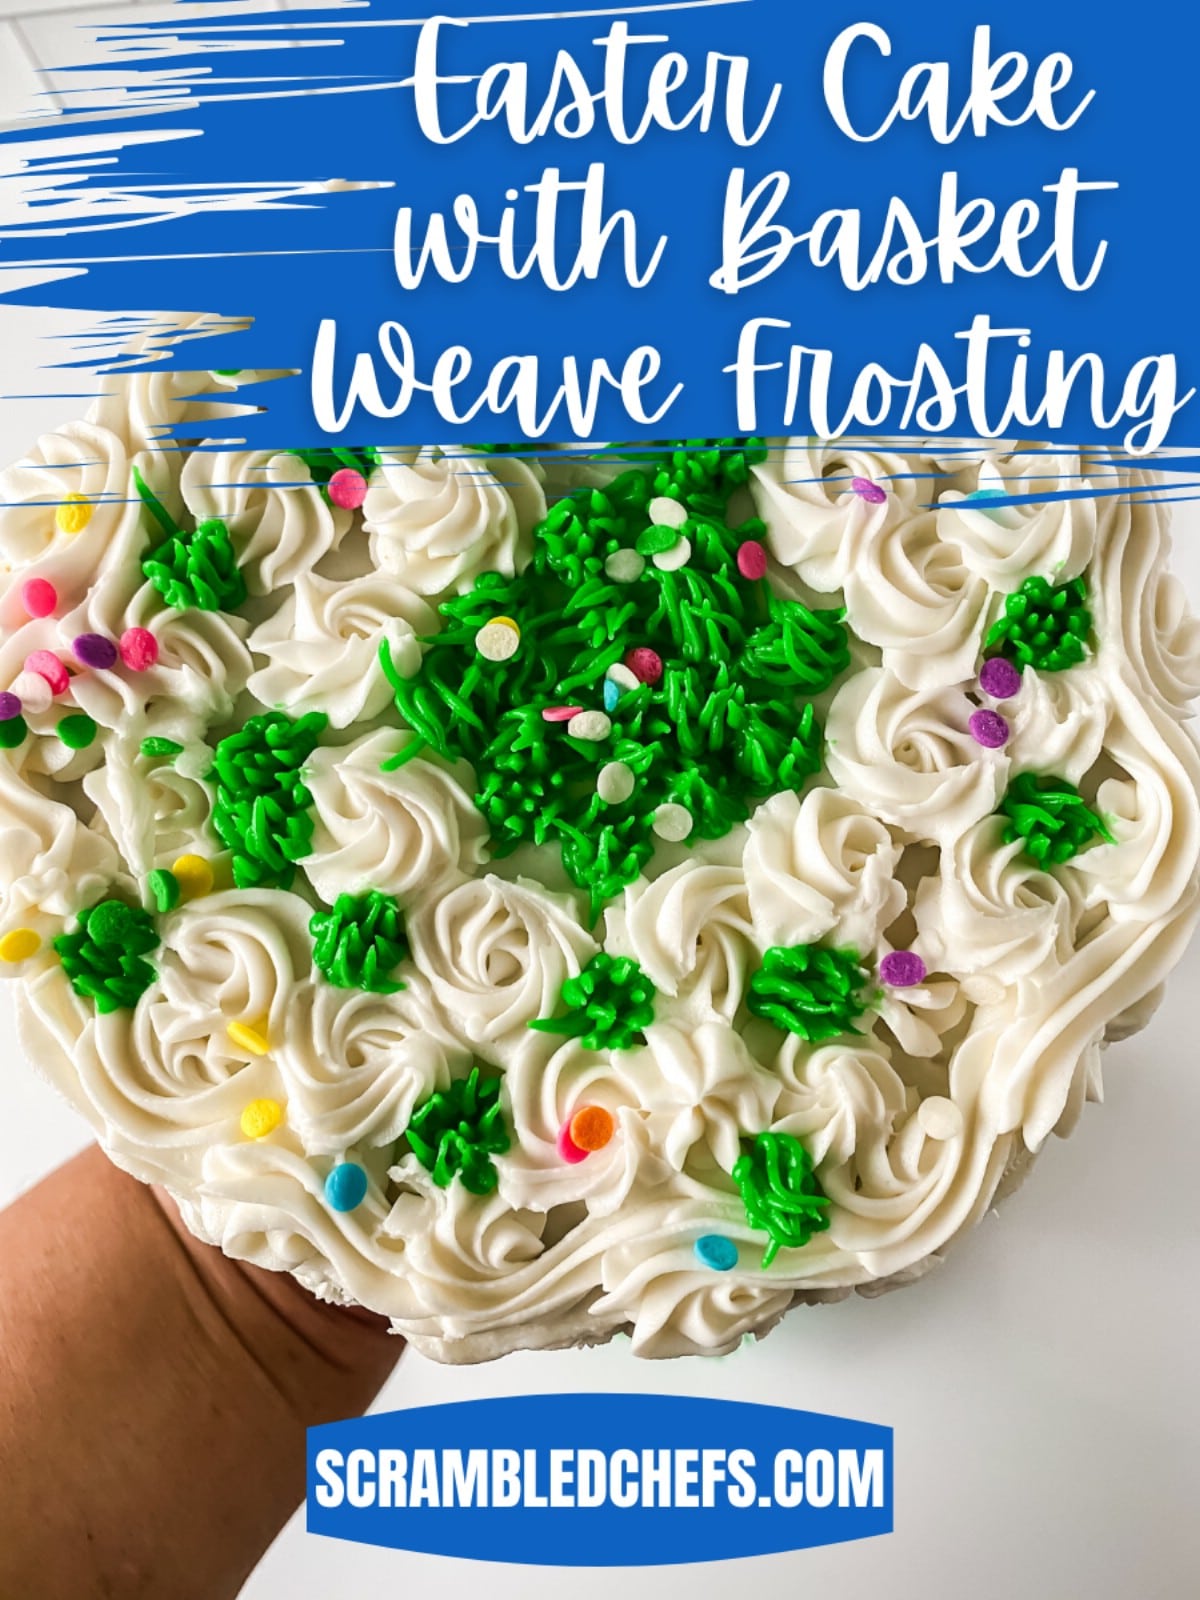
Decorate the top of the cake with green grass icing, colored coconut shreds, candy eggs, or similar ideas.
Chef's Tips
When making this pattern, always follow the vertical then horizontal pattern. Do not attempt to make this work by doing all vertical lines at once.
If you decide to use colored icing for this pattern, always make extra icing than you feel you need. It is better to have too much icing than to have to make extra and be unable to match the icing color the same.
More Easter Recipes to Try
Want more ideas to add to your menu for Easter? Don't miss these other favorites we have added to our Easter menu! So tasty and easy to make.
- The Easiest Dyed Easter Deviled Eggs Recipe
- Soft Italian Easter Cookies Recipe
- The Best Easter Egg Sugar Cookie Recipe
- 3-Ingredient Homemade Toffee Recipe
- The Best Homemade Hot Cross Buns
📖 Recipe
The Easiest Easter Cake Basket Weave Icing Tutorial
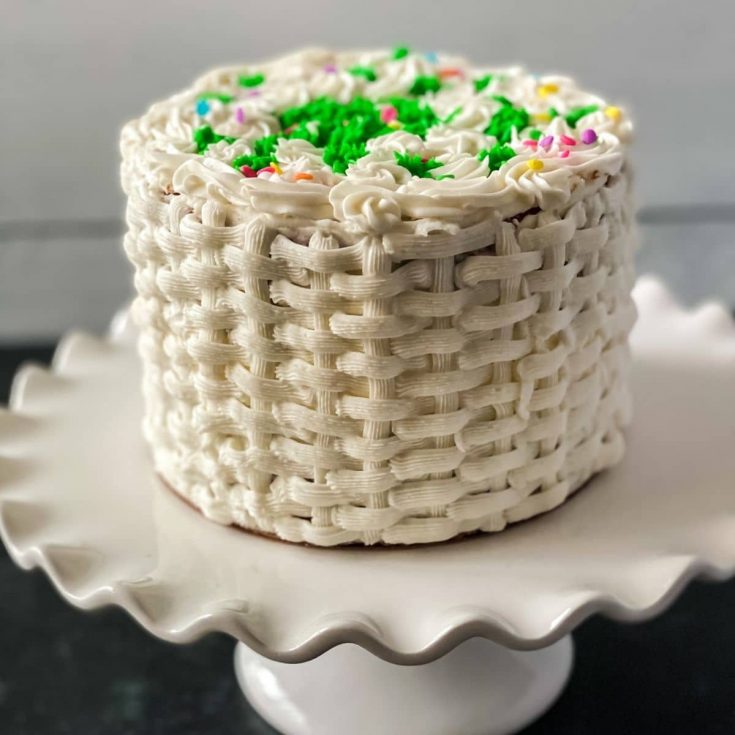
Follow this simple step by step tutorial to create an Easter cake using a simple basket weave icing tutorial.
Ingredients
- 3 (6") round vanilla cake layers
- 5 cups buttercream frosting
Instructions
How to Set Up the Cake for Icing
- Set up your workstation using a lazy susan or turntable with a cake board on top.
- Place a dollop of buttercream onto the center of the cake board, this will hold the cake in place.
- Place a cake round onto this and then top with a layer of icing. Repeat until all 3 layers are in place with icing between each.
- Add a thin layer of buttercream icing around the entire cake as a crumb coat.
- Refrigerate the cake for 10 to 15 minutes while you prepare icing in the piping bags.
- Place the coupler into the piping bag and fit with a 47 basket weave tip.
- Fill the bag half full with prepared buttercream icing, then remove excess air and twist the top to secure.
- Place the cake back onto the turntable.
- To decorate, keep a visual in mind of the top of the cake looking like a clock, this will help you to follow the directions below better.
How to Begin the Basket Weave Process
- Hold the piping bag at a 45° angle starting at the 6 o'clock point.
- Carefully, and lightly, touch the piping tip to the side of the cake with the serrated side up, and squeeze out a vertical strip of icing from the top to the bottom of the cake. Maintain even pressure for best results.
- At the bottom, stop squeezing and then pull away. Throughout this process, you will use the clock format and "squeeze, stop, pull away".
- Move to the 3 o'clock point on the cake, and with the same 45° angel, squeeze out short horizontal stripes of icing over the vertical line starting at the top and working your way to the bottom. Maintain an even distance between these horizontal stripes.
- Pipe another vertical line starting at the edge of the horizontal stripes and covering them from top to bottom.
- Continue this process working your way around the cake with a solid vertical stripe, then horizontal stripes, then vertical, and so on until all of the cake is covered with the basket weave pattern.
- Decorate the top of the cake with green grass icing, colored coconut shreds, candy eggs, or similar ideas.
Notes
Add food dye to the icing to create a different color basket.
Recommended Products
As an Amazon Associate and member of other affiliate programs, I earn from qualifying purchases.
-
 Cake Icing Spatula Set of 4 Packs(10"+8"+6"+4") and Cake Smoother Scraper Set of 3 Packs, Professional Stainless Steel Offset Spatula with Wooden Handle
 -
 Upgraded anti-burst piping bags, disposal pastry bags for cake and buttercream frosting, cupcake baking decorating icing bags, thick, non-slip for all size tips and couples (12 inch, 100pcs),Gexolenu
 -
 BronaGrand 10pcs Plastic Standard Couplers Pipe Tip Coupler Cake Decorating Couplers for Icing Nozzles,White
 -
 Symphony Wire Tips, Stainless Steel Icing Piping Nozzles For Pastry Fondant Tools (D)
 -
 Kootek 11 Inch Rotating Cake Turntable with 2 Icing Spatula and 3 Icing Smoother, Revolving Cake Stand White Baking Cake Decorating Supplies
 -
 Satin Ice Buttercream Icing Mix, 2 Pounds
Nutrition Information:
Yield:
18Serving Size:
1Amount Per Serving: Calories: 333Total Fat: 16gSaturated Fat: 10gTrans Fat: 1gUnsaturated Fat: 5gCholesterol: 45mgSodium: 16mgCarbohydrates: 46gFiber: 0gSugar: 44gProtein: 0g





Join the Discussion